AoN_Random for Usine
Repeatable Randomness for Modulation and Arrays.
When I started investigating Sensomusics "Usine", a great live-focused, node-based audio application, I immediately missed a way to have repeatable, Perlin-like noise for modulation of parameters as well as for the creation of arrays, which can be used in many ways in Usine, one of them being the creation of midi note patterns.
I personally enjoy those pseudo-fractal structures in many different forms, from 3D procedural shaders I wrote for different render applications to - like in this case - audio applications. To my ears, it is the most natural sounding basis for any kind of generative algorithm, since it behaves in a way which is everywhere in nature, from the outline of distant mountains to clouds to the structures you usually see on sheet music.
So I created these two nodes in C++ with the Usine SDK that can go from Sample-and-Hold like hard jumps all the way to fully smoothed out and from single octave non-fractal simpleness up to 16 octaves of pseudo-fractal detail. All of this can in itself be modulated/animated so it should give you a lot to play with.
Enjoy!
Here are the downloads (Windows Only):
For Usine 5.x: AoN_Random
For Usine Hollyhock: AoN_Random
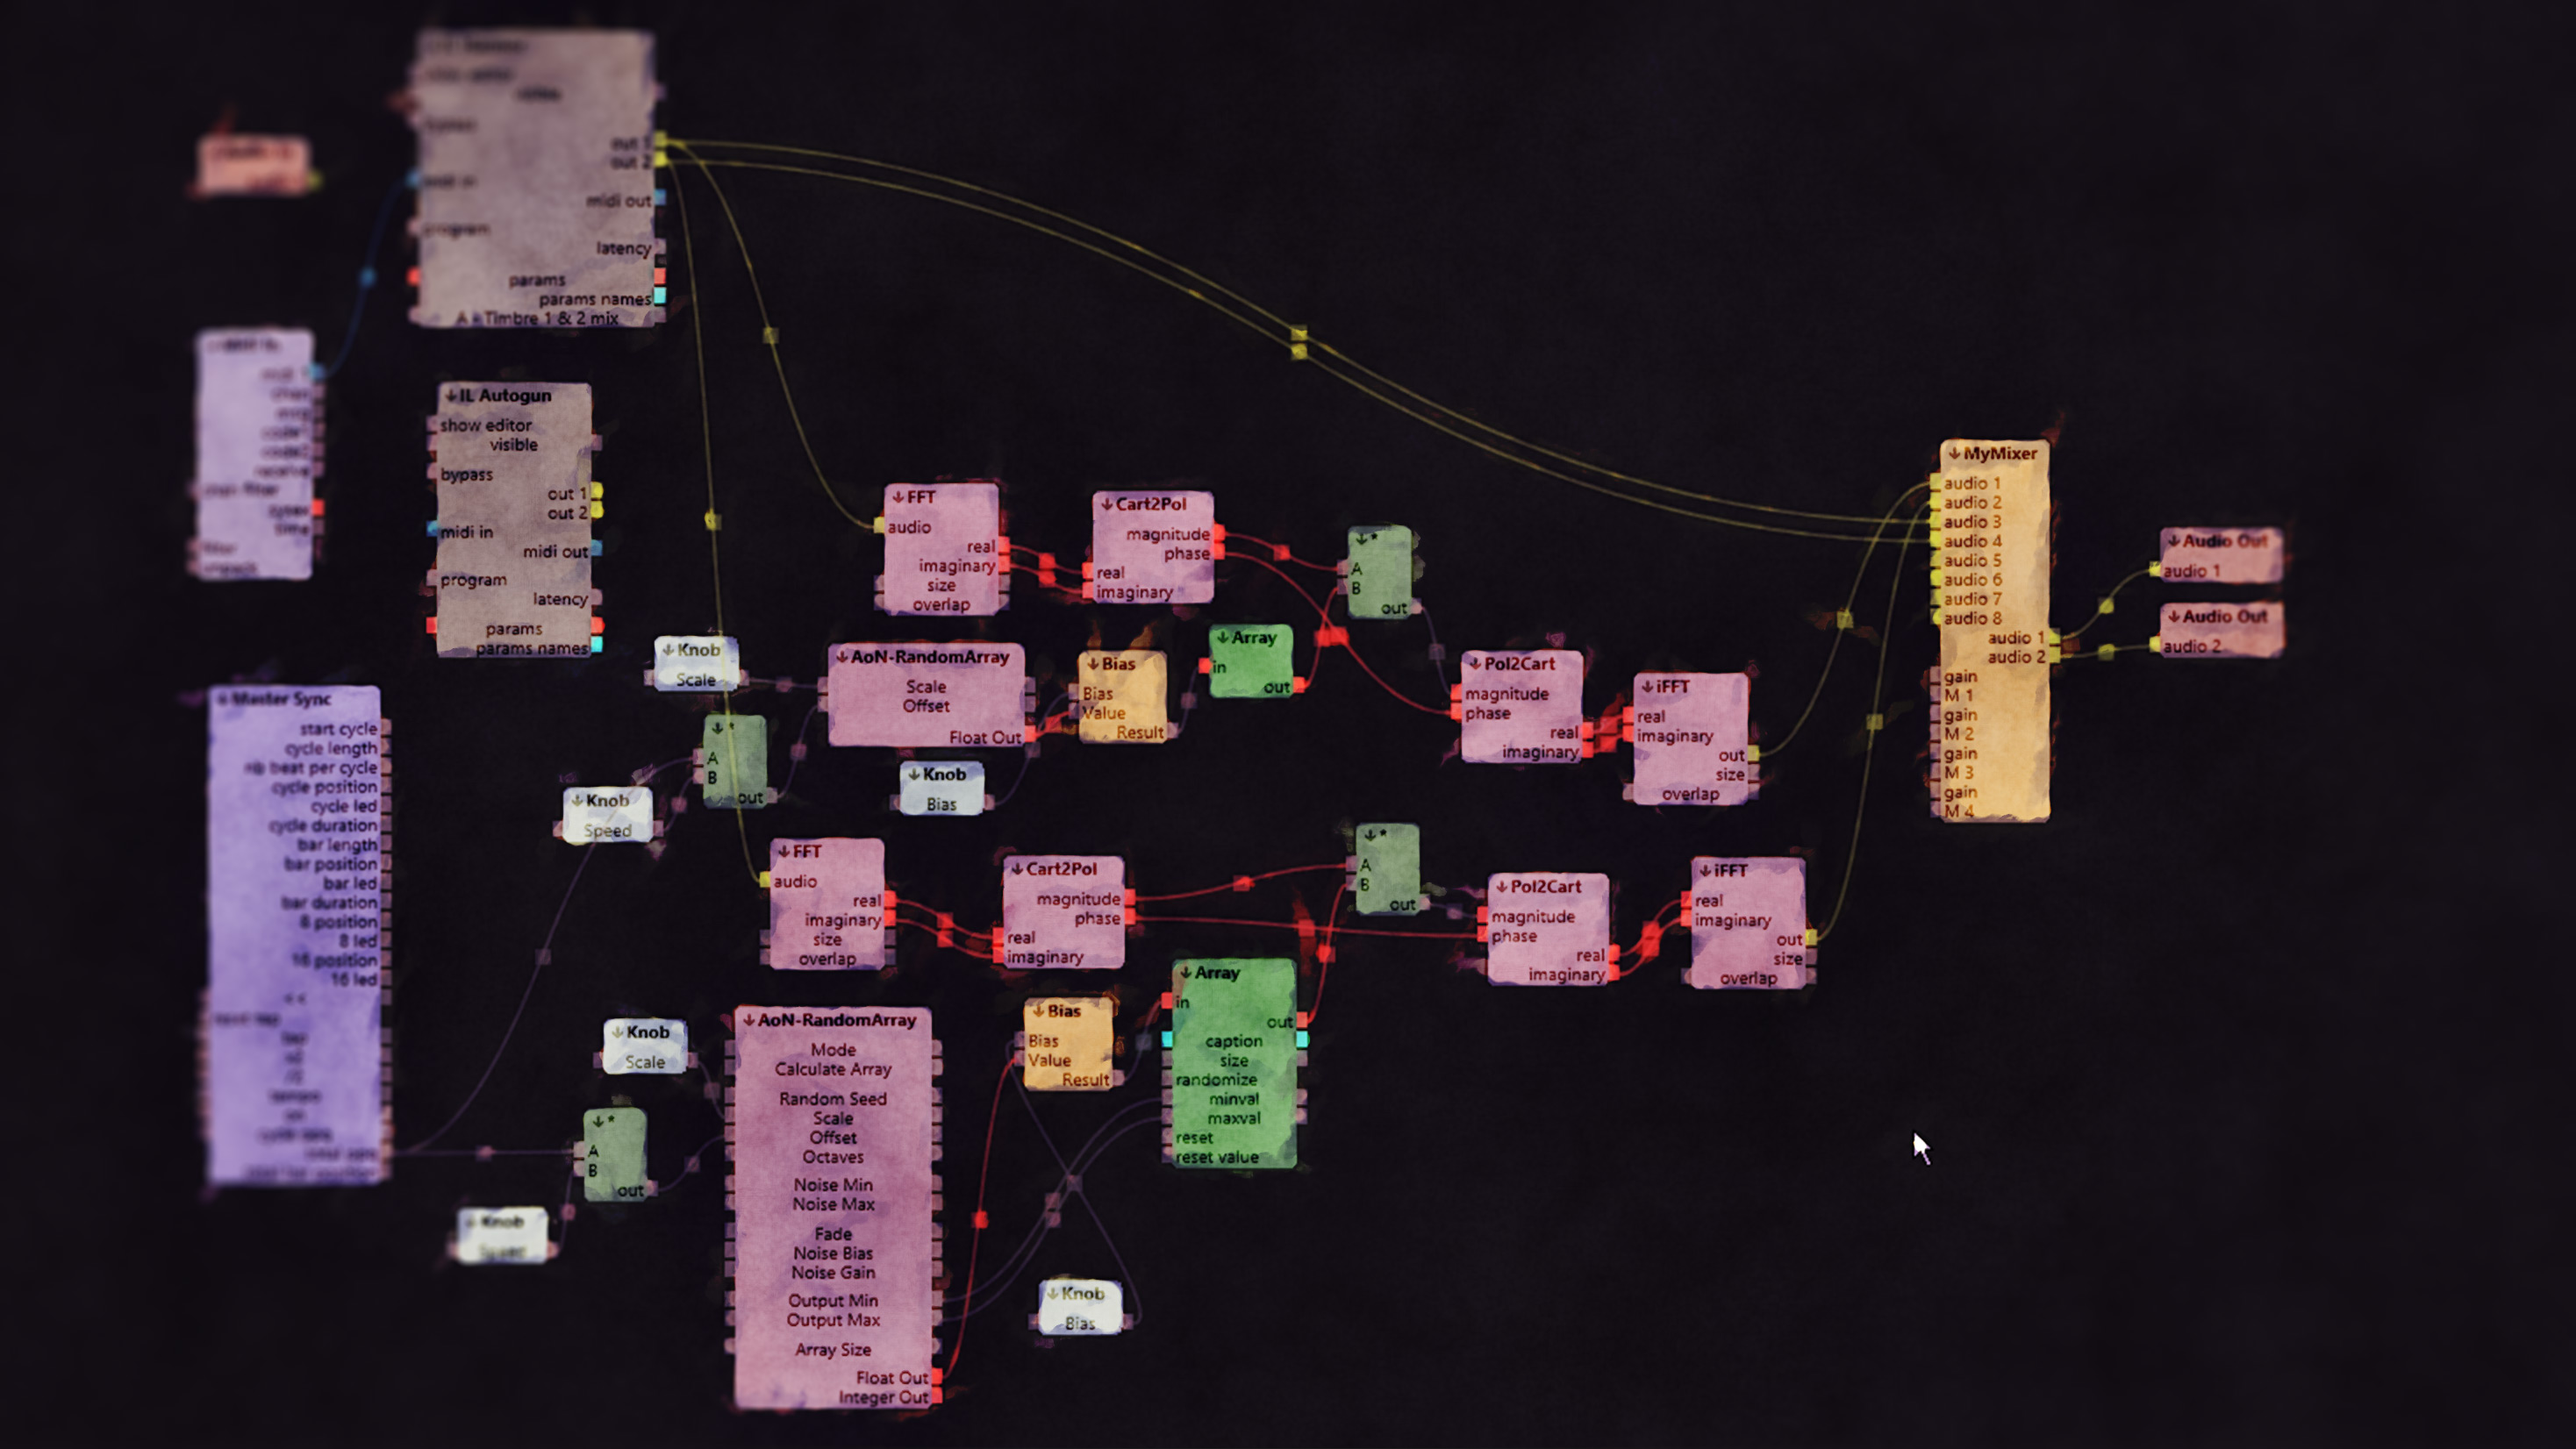
AoN_Random:
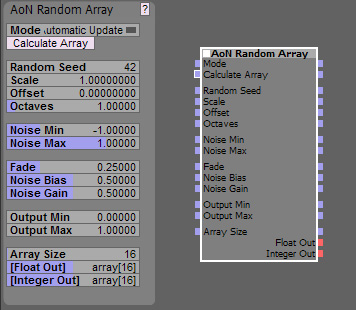
This is the interface with default settings (all Screenshots from Usine 5.x):
AoN Random is an user module to create pseudo-random sequences of control events with a lot of control over the result.
Pseudo random because it will create the same sequence for the same input numbers, which is often preferable over real randomness, since you can repeat a certain sequence you like to get reliable output.
It is based on some shaders I did for 3D-graphics, but I hope you will find it helpful for audio as well - I tried to adapt the underlying concepts to be useful in this area.
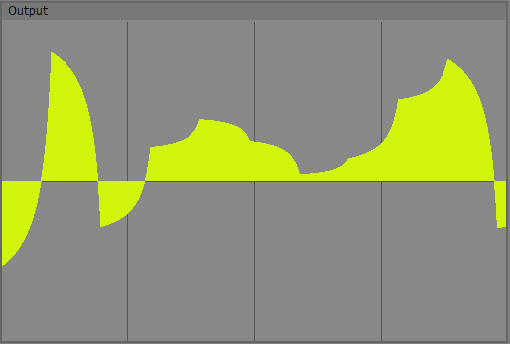
Here's a rather complex example:
Let's look at the controls:
Input:
Here you plug in the values that the noise is based upon - without this, nothing will happen.
Usually you will use some kind of timing information, in my tests I mostly used a MasterSync nodes "tot ppq" output which I multiplied to get a fitting range. For this, I highly recommend using an oscilloscope on the Output to visualise what's going on like in the screenshots below.
I decided to not include timing tools inside of the node for now to not waste time on things already covered in Usine and because instead of time, you can also plug in the output of a sequencer, a LFO or any other generator that produces (continuous) streams of data. Just make sure the values span a large enough range (or multiply it with “Scale”) since AoN Random in essence creates a random value per 1 unit of input, so a 0-1 input will not do much, a 0-10 or 0-100 input will be more interesting.
Random Seed:
For each integer value of Random Seed, a completely different internal table of random values is created (9973 of them in fact). So even for pretty long loops, you shouldn’t need to change this in a performance.
Still it can be convenient to change the value to instantly get a different sequence of values.
For instance, if you don’t use time, but a sequencer as input and you want to try out different patterns for a fixed range of input values (for an alternative, see the Offset parameter below).
Since the internal sequence is generated based solely on this value, you should get exactly the same results (for repeatability) when using the same setting again.
The creation of the random number sequence can take a bit of CPU, so you shouldn’t normally modulate it constantly. If performance is a concern, try changing the "area you see" with Offset instead.
Tip: Be aware that "Random Seed" changes the underlying noise values completely, so no smooth interpolation is possible ATM. If you need that, I’d recommend fading between two AoN Random nodes with different Random Seeds and only change Random Seed when the influence of one of them is at zero (so the jump can’t be heard).
Scale:
This value is multiplied with whatever comes in on the "Input" connector.
A value of 1.0 (the default) will use your Input values directly, smaller values will give you a zoomed in view on the noise where details are more stretched out, while larger values at one point will give you something that looks more like typical randomness, since you can no longer see the interpolation. You could also say, that smaller values “slow down” the noise and larger Scale values speed it up (if you feed in time that is).
This is basically your main "Speed" value, but it can't be animated/modulated smoothly, since it is a zero-based simple scale, so changes make all the values between zero and your current position "slide by"...
Scale has basically no impact on performance.
Offset:
This is basically a convenience input: It’s value is added to the Input value on every level of the noise. I realize that it isn’t really necessary, since Usine adds values automagically if you have several connections to the same input, but it’s still convenient if you only want to have a static Offset to see a different noise area without additional nodes.
The idea is, that for instance you have a Master Sync node feeding into the main Input, and then something else to distort the very even flow plugged into Offset, like a LFO or another AoN Random node (go crazy! :-) ).
This allows you to easily break up the initially relatively regular distance between the random values, giving you a more random feel in time. See the included AoN Random Example.wkp for a - well - example :-)
Offset has no impact on performance.
Another application is, to use Offset as a way to have several noises fed by the same input but still have every one generate a different part of the sequence, simply be offsetting each node by some number.
Alternatively you can use "Random Seed" to create a different sequence in each node.
Octaves:
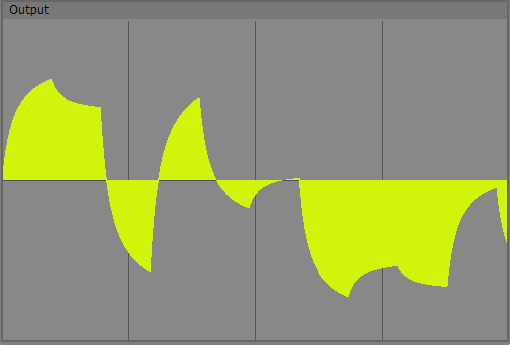
If set to 1, only a basic sequence of random numbers will be created, basically one for each 1 unit of input:
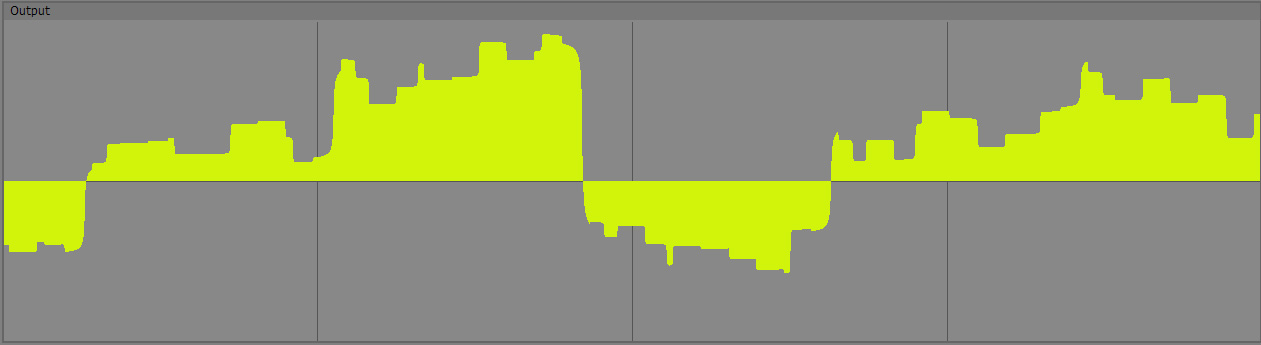
If set to 2, a second layer of randomness will be added, at half the intensity and half the size (this is the reason to call it “Octave”). This results in pseudo-fractal detail. Here's a setting of "3":
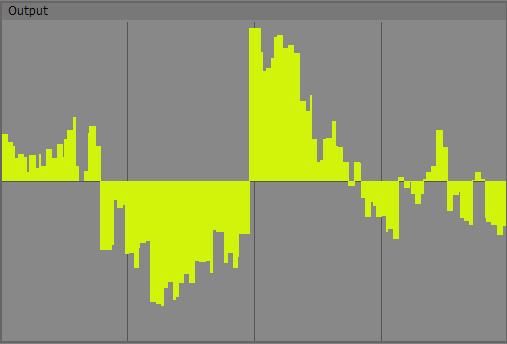
You can see how the two additional octaves add “local” detail to the larger blocks (It's not exactly the same area though, sorry). I’ve limited Octaves to 16, since IMO it makes not too much sense to go higher - if you should find this being a limitation for your use, please let me know. The reason why I limited it is, that for each octave, the algorithm is recalculated, so for 16 octaves you have basically 16 times the CPU load. So only use as many octaves as you really need, otherwise you waste resources.
In most implementations, octaves are integers. But I always found this limiting and the sudden changes as unwelcome in graphics as it would be in audio. Therefore, in AoN Random you have a floating point value to dial in octaves and they fade in and out smoothly. This also makes it possible to control the amount of detail in the noise with other controllers. For input values from 0 to 1, the first octave fades in, between 1 and 2 the second and so on.
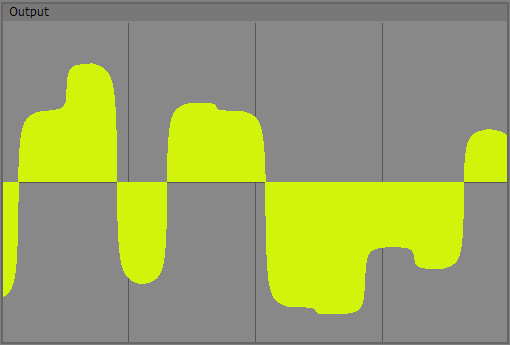
Noise Min / Noise Max:
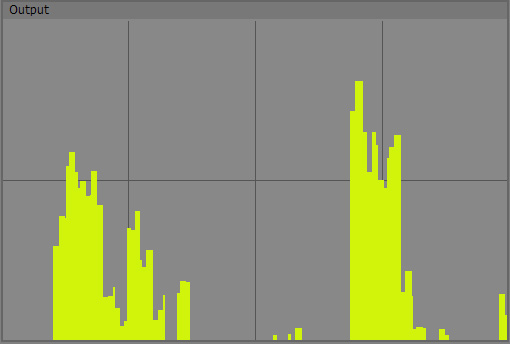
Internally with one octave, the noise is always normalised into a range between -1 and 1. Now when you use more octaves, it is possible that some parts go out of this range and are therefore cut-off. With Noise Min and Noise Max you can open this range up a bit to get the full spectrum of the noise created. But sure you can also use it as a creative tool: For instance, if you set Noise Min to 0.0, the lower part of the noise will be cut off completely leaving only the part above 0 like some islands where you get parameter changes. If you would set Noise Min to 0.5, it would be even more extreme and only very sparsely you would get output. This is great if you want an every-now-and-then stutter rather than a continuous noise.
Here is an example of a noise similar to the 3 octave setting above, but Noise Min set to 0.0 to cut off everything below:
So while this isn’t the most important parameter, sometimes it will come in handy. It has virtually no influence on performance
Fade:
Now to the fun part :-)
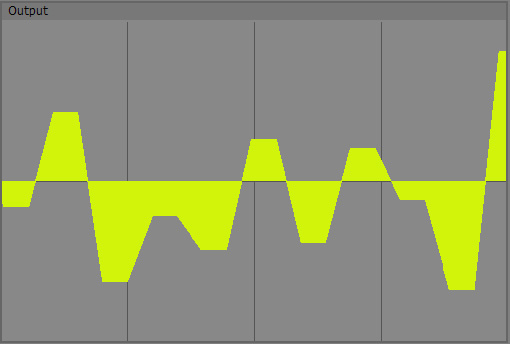
Fade is a control that allows you to interpolate between the random numbers. At a value of 0.0, no interpolation takes place, you get a “Sample and Hold”, hard stepped result like in the examples above. For values higher than zero, you get a slope between the steps. If you set Fade to 0.5, you get 50% slope and 50% plateau, Fade at 1.0 will give you slopes only, which will produce linear ramps with no plateaus at all.
This first example shows AoN Random with 1 octave and a Fade-value of 0.5:
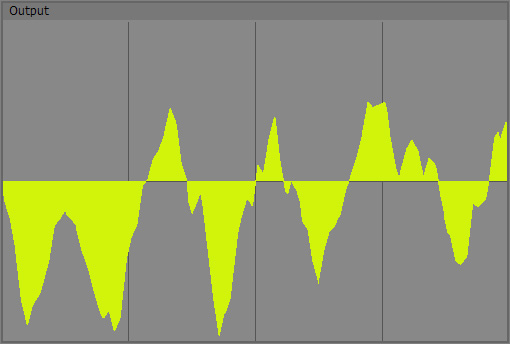
Then Fade is turned up to 1.0 - which results in “nothing but (linear) interpolation”:

Finally, Octaves turned up to 3, to get interpolated, more detailed noise:
Noise Bias & Noise Gain:
Now this is all fine and dandy, but sometimes you may not want such straight, linear interpolation. This is what Bias and Gain are for.
(Maybe it’s important to say, that this isn’t exactly what the words Bias and Gain are used for in Audio usually, but in graphics it is and I took the words from there).
So what is it? Bias will move the values of the slope in a curved fashion more forward or back in "time" (it naturally only does something if Slope is > 0 so there's some meat to mangle ! ).
Important to remember is, that the neutral value here is 0.5 (same as for Gain).
At a value of 0.5, nothing will happen, like in all the above examples (the default).
Below 0.5, the slope will be bent forward in time, above 0.5 it will bend backwards - in essence forming shark-fin like curves.
A one-octave noise with Noise Bias at 0.15 ("forward swimming shark" ;-) ):
And the other way around, Noise Bias at 0.85:
Noise Gain is like two Noise Bias split in the middle and one inverted, creating symmetrical roundings at the bottom and top at the same time. Again, the neutral value is 0.5. Below that, the slope will be rounded off at the bottom and the top outwards, giving you a rather smoothly interpolated result.
Noise Bias back at 0.5 and Noise Gain at 0.05:
Use values like 0.25 for quite smoothly interpolated values and very low values if you want just to "round off" your plateaus a bit. You can go quite extreme but never fully reach 0 or 1 (has to do with the algorithm which is exploding above and below).
Here Noise Bias is at 0.5 and Noise Gain at 0.95 doing the opposite:
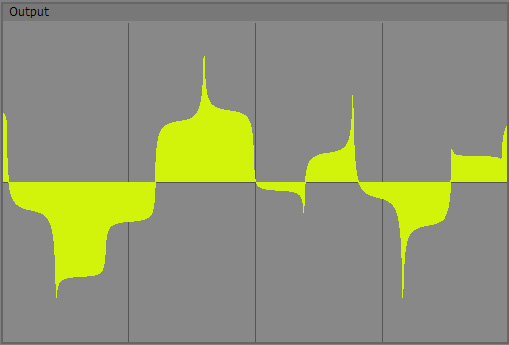
With such high Gain values you can create spikes and intermediate plateaus.
All those Bias and Gain settings can be mixed and matched as you like as well as animated.
They have a slight influence on performance for values other than 0.5.
Output Min & Output Max:
We’re mostly done now, but these two controls allow you to adapt the output to your needs conveniently. They spread the internal values to a range of your choosing. So if you need control values between 0 and 1, you would set Output Min to 0.0 and Output Max to 1.0. For a range of -48 to 66, Output Min would be -48 and Output Max 66. I guess you get the drift ;-) Basically this spares you some extra nodes.
A nice use of the Min and Max outputs on the node is, to connect them with the min and max inputs of an oscillator or step module to automagically set the range to the same values as the AoN Random output. See the included examples.
Min and Max has no impact on performance.
Output:
Well, this is where the generated data comes out for your further modulation pleasure :-)
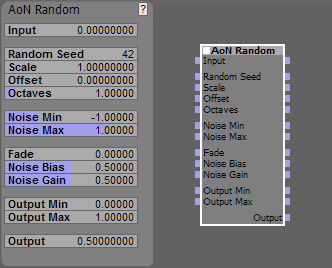
AoN_Random_Array:
I'll keep this one much shorter. Basically the settings are exactly the same as above, only that we now no longer deal with a stream of modulation data but with an array containing a "slice" of basically the same data as you can see in the GUI:
Here are the parameters that are different from the AoN_Random Module:
Mode & Calculate Array:
The Mode dropdown allows you to select if you want automatic, instantaneous updates if you change a value or only want updates to occur if you click on the “Calculate Array” button (or trigger the input, for instance with a clock). For learning the ways of the node, I recommend the Automatic Mode, since it is very cool to directly see what the values do. If you find the recalculations too CPU hungry, use the Update on Click Mode.
The later can also be used to create specific snapshots at certain times. It shouldn’t use any CPU at all until clicking the button. The button has no real function when the Automatic mode is used.
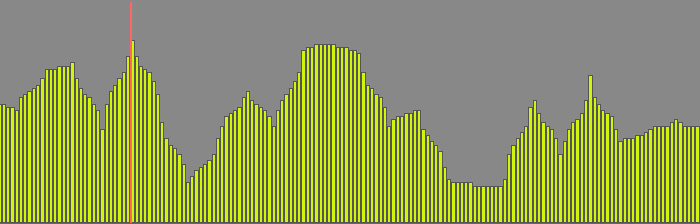
Scale:
Like above but looking a bit differently since I visualize the output with a step module:
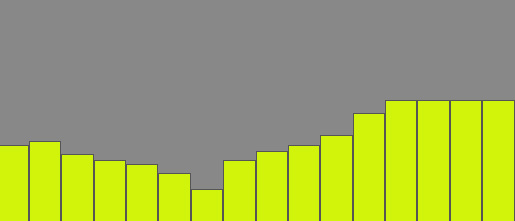
This is a noise with Scale 0.08, Fade, Bias and Gain used - we can clearly see the features:
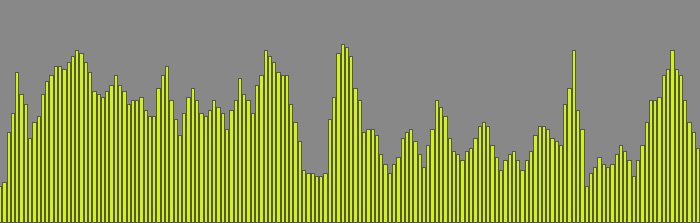
The same noise with Scale 0.35 - starts to look a bit more crowded:
And the same again with Scale 1.0, now looking almost like random noise:
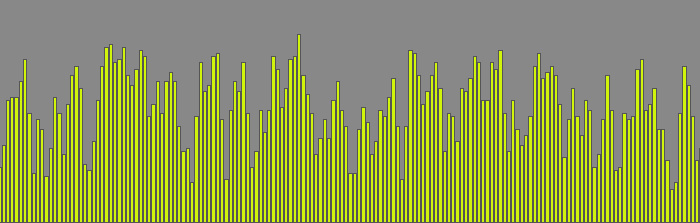
So a larger value here means, that you can “see more” of the noise = zoom out, with smaller values you zoom in and can see/hear the larger detail.
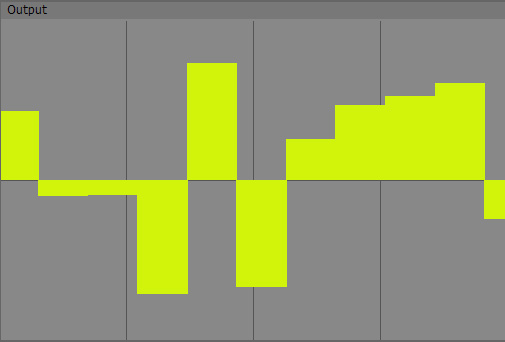
Array size:
Well, I guess this is self explanatory: this is how many values you have in your array.
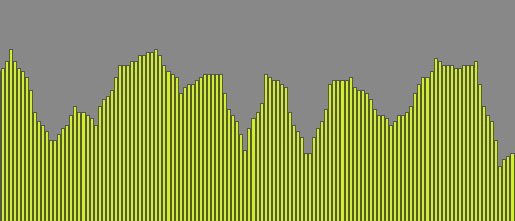
An array with 16 entries:
And an array with 128 entries:
Connect the Array Size output to the array size input of the step module to sync them automatically.
Float Out & Integer Out:
For your convenience, I have created two outputs which both export the same noise sequence simultaneously, one as Float Array and one as rounded Integer Array.
The first is good for parameter control with smooth interpolation, the second is best for something like midi where you need discreet values. For the latter, set your lowest note with Output Min and the highest with Output Max and connect the array output to a step module which then connects to the midi in of some sort of sound generator.
Now you can for instance modulate the Offset parameter every four beats so that the sequence constantly changes - a bit or a lot, whatever fits.
Endless possibilities really.
That's it from my side - if you have questions feel free to send me a mail.
Otherwise: Enjoy! :-)
P.S. In case you wonder: "AoN" stands for "Art of Noise", a name that I used for my 3D shaders for messiah:studio.